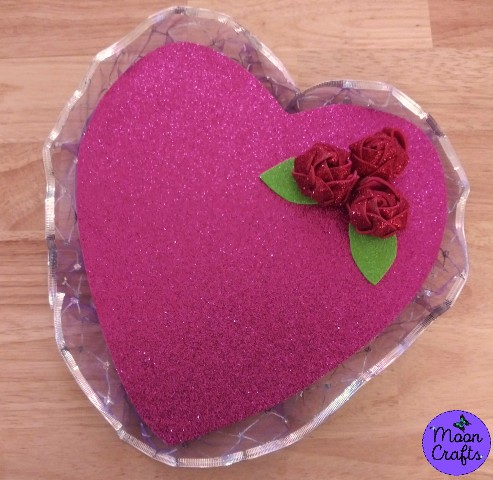
This time it's this cute heart with roses that is perfect for decorating anywhere you'd like.
Materials:
- Card Board
- Glitter foam sheets
- Non-glitter foam sheets
- Glue gun (and glue sticks)
- Scissors
- Wire Ribbon (or any other kind ribbon as long as it's sturdy and a bit wide)
- Small Ribbon
- Pen/Pencil or something you can use to trace on the foam sheets
1. You need to trace a heart on a piece of cardboard (I just used part of an old box.) Then cut it out.
2. Trace the heart onto the back of the glitter foam sheet; like so. (If you want to cover the back when it's done for a more finished look I recommend cutting two hearts - one with the glitter foam and one with plain foam.)


3. You're going to glue the glitter foam to the card board.
4. Now it's time to glue the wire ribbon all around the heart.


(If you're going to cover the back; now would be a good time to do it. You can go ahead and make a small loop with the smaller ribbon and glue that to the back as well, so you can hang the heart wherever you want.)

5. You're going to cut-out two (2) tear drop shapes for the leaves out of some green glitter foam.


6. Now we're going to do the roses. I made three; you can do as many or as little you'd like to do. I learned to do these roses from an awesome YouTube tutorial I found. So I'll just give you the basics here but you can go watch the complete tutorial at this link: https://youtu.be/KkQGMPZgbxg (It's in Russian (I think?) but it is fairly easy to understand what they're doing.)
Anyway, with the red foam cut-out a long strip (approx. 1.5 inches wide x 7 inches long). You're going to then cut that strip into three strips (approx. 1/3 of an inch each) without reaching the edge.

7. Now you're going to braid the three strips until you reach the edge. Once you finish braiding you're going to glue the three edges together so your braid doesn't unravel.
8. Then you're going roll up the braid (gluing it together as you go along) until you have a rose like the one below.

9. Now just add the roses where ever you want on the heart and you'll get something like this:
Here are some hearts I made a few years back that are similar to the one I made for this tutorial.


They're really easy to make and are perfect for so many occasions.
Hope you enjoyed this Step-by-Step. Stay tuned for a lot more coming soon.
If you have any suggestions about something you'd like me to try please feel free to get in touch with me. All my social media handles are in the sidebar.
Thank you and I'll chat with you later! Hugs! ❤️
~ Moon
No comments:
Post a Comment